|
|||
 |
|||


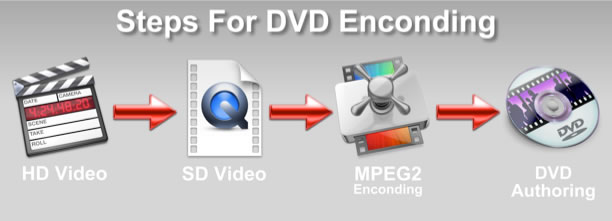
Other Links: rip DVDs to iMovie, rip a DVD to an iPad, rip a DVD to an iPhone,AVCHD,MTS, Blu-ray to Quicktime Transferring HD Video to DVDConverting HD video to a DVD isn’t nearly as easy as it sounds. The vast majority of video cameras now sold shoot HD (High Definition) video. Therefore, most of the video transferred to DVDs now comes from HD video cameras. HD video supports many different frame rates and resolutions. Editing HD video containing mixed frame rates and different frame sizes is fairly common. However, mixed frame rates and video sizes are difficult to encode for DVD and can cause jitter and resizing artifacts on DVD. To avoid these problems, you must make your video simple to encode for DVD. Always break down the DVD encoding workflow into multiple steps and check the video at each step. This article will show you how divide up your DVD encoding workflow DVD using the tools in Final Cut Studio.
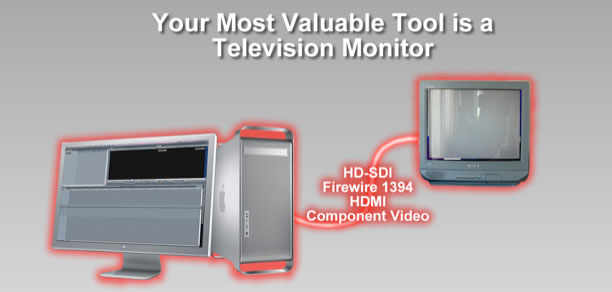
If you plan to author a DVD, your most valuable tool will be interlaced television monitor attached to Final Cut Pro. Playing the video out of Final Cut Pro to your television monitor will help you spot problems in the DVD encoding process. To do this, you can use a firewire DV converter, an HD-SDI output, an HDMI output, or component output from a capture card to connect Final Cut Pro to a television monitor. You cannot directly connect an HDMI or S-Video output from your Mac to your TV. The video must go through a capture card first, so that the video signal is interlaced and encoded with the correct colors. The next most valuable tool is good DVD ripper that you can convert your footage from the DVD so that it can be played in Final Cut Pro. This is needed to spot compression problems on your DVD. Video ripped from a DVD with DVDXDV should always play properly in Final Cut Pro. The Problems with HD Video and DVD
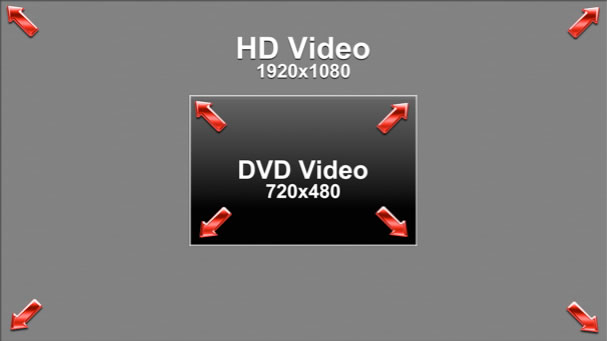
Many people claim that HD footage looks blurry on DVD, but looks great in Final Cut Pro. The picture size difference between HD and DVD video is often the cause. To understand how much smaller your HD video is when delivered on DVD, think of your DVD screen as being a 4 inch by 6 inch photo. By using the same pixels per inch scale as your 4x6 photo, a 1080 HD photo would 16 inches wide by 9 inches high. As you can see, there’s a lot of resizing that must be done to HD video to fit on a DVD.
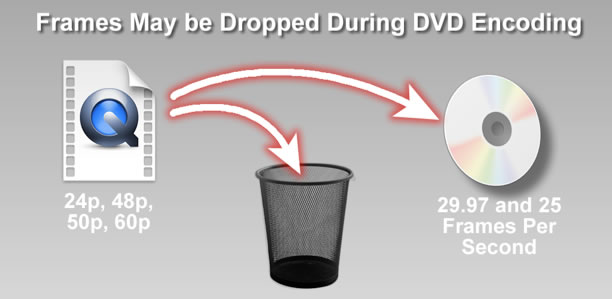
DVD video supports only two types of frame rates which are 29.97 for NSTC and 25 for PAL. While the original mini-DV camcorders only recorded in two frame rate, HD video cameras are capable of recording in non-standard rates, such as 50p, 60p, 48p, and 24p. If you export HD video containing mixed frame rates from your sequence in Final Cut Pro, you may find problems on your finished DVD. Problems happen when the MPEG2 encoder tries to conform the video back to a standard frame rate. If the MPEG2 encoder is unable to modify the video to a fixed frame rate, the video will have jitter when played back on a television.
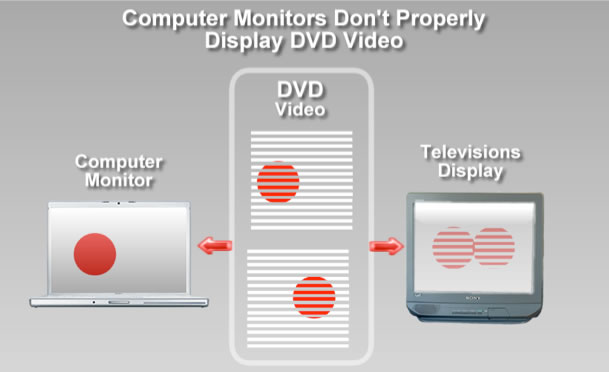
You can’t see these DVD glitches on your computer for several reasons. A computer monitor does not produce the same image as a television. A computer monitor is progressive scan while a television is an interlaced monitor. In addition, a television uses a different color formula called YUV color (brightness and two chroma components) while your computer monitor uses RGB color (red green and blue). This means that video on your computer monitor will never have same color as a television because of the formula differences. The Quicktime player will often drop frames when playing back video. If there are dropped frames in your DVD you may not see them on your computer, but you will see them on your television. Only by sending the video through a capture card or firewire converter, will you be able to see what your video really looks like.
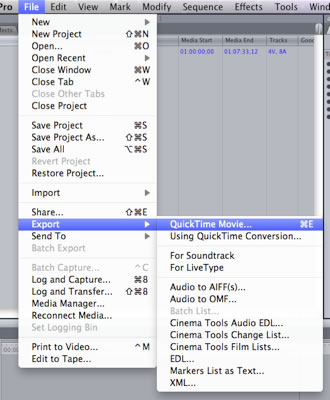
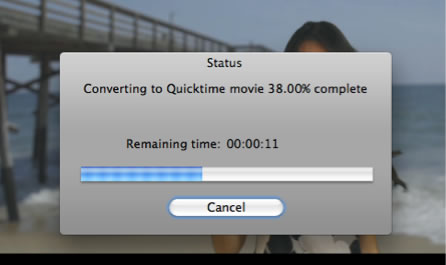
Exporting From Final Cut Pro for DVDThe first step in preparing your video for DVD encoding is to export a self contained Quicktime movie from your Final Cut Pro Sequence. The Quicktime movie should be in a Standard Definition format. This Quicktime movie will be your DVD master video that you will import into Compressor or DVD Studio Pro. Never use the “send to Compressor” option from Final Cut Pro or the “share to DVD”. This will cause problems in your finished DVD. From Final Cut Pro, select the “Export->Quicktime Movie..” menu option.
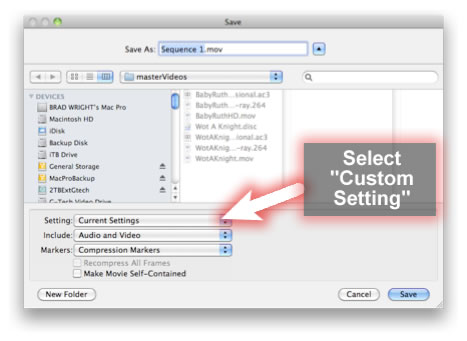
You will see the “Save” dialog appear. Under the “Settings” popup button select “Custom Setting”.
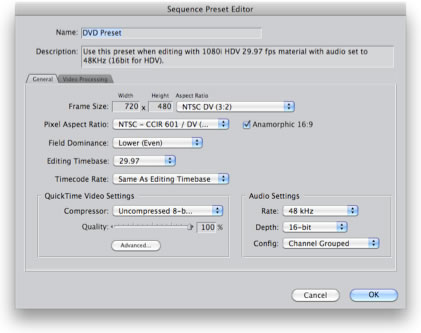
You will see the “Sequence Preset Editor”.
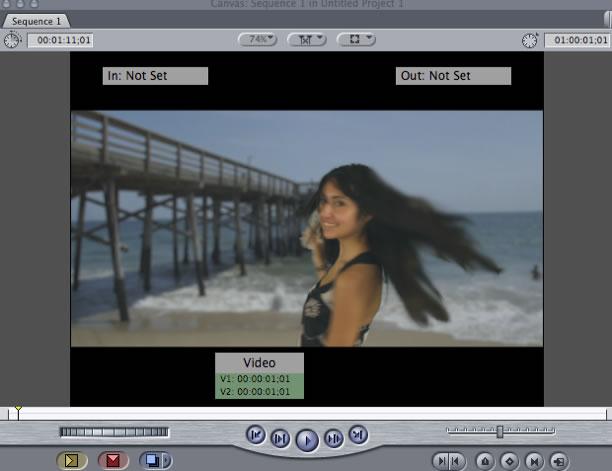
If you are creating an NTSC DVD, use the frame size 720x480 anamorphic and a frame rate of 29.97 frames per second. For a PAL DVD, use the frame size 720x576 anamorphic and a frame rate of 25 frames per second. For the best results, set the interlaced field order to lower. The 29.97 and 25 frame rates work for all material. However, if you have a timeline that is 24p then you should change the frame rate to match that of your timeline. There are situations where this can cause problems. You only use these different frame rates if you understand differences between NTSC frame rates and PAL frame rates. Test Your DVD Master Footage in Final Cut Pro After you have created the finished Quicktime movie, import your new movie back into Final Cut Pro and play it back on your television monitor. Look for possible stuttering around anything moving in the video. This is caused by the interlaced field order being set wrong by the quicktime export. However, if you are using a capture card that only supports upper field dominance, add the “Shift Fields” filter to the video clip. Keep in mind this is the best the video could possible look. It may look a lot worse when it is encoded to DVD. Make sure you watch the video all the way through in Final Cut Pro. If see problems in the video, don’t encode it for DVD. Fix the problems in your original editing sequence and export the video again to a self contained Quicktime movie. Make sure you are happy with the look of the video before encoding it for DVD. If you use DVD Studio Pro to create the DVD, there is a build menu option to create a DVD image on your hard drive. This build menu option creates a VIDEO_TS folder on your hard drive which can then be used for further testing. By testing with the VIDEO_TS folder your hard drive, you can save a lot of time and money by not burning a DVD.
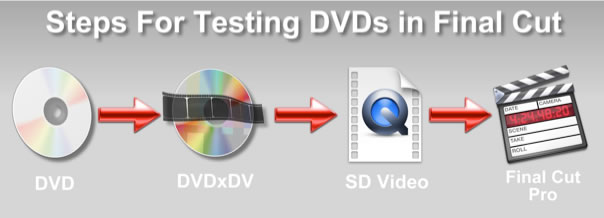
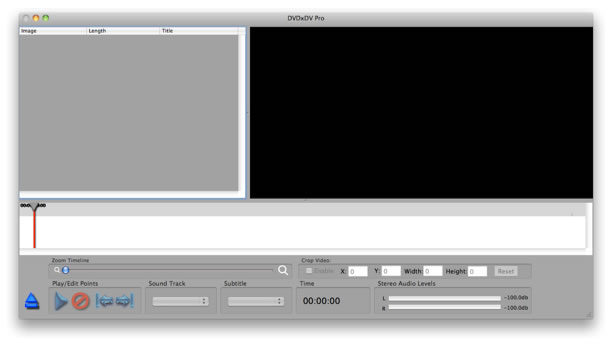
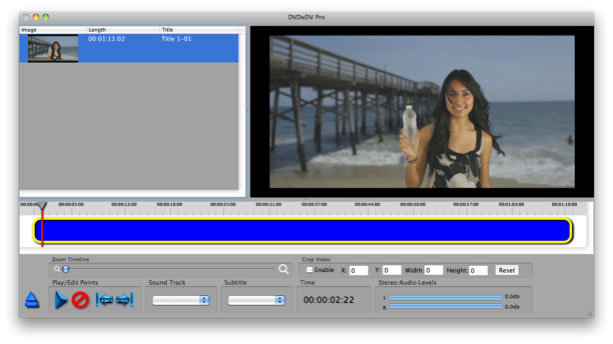
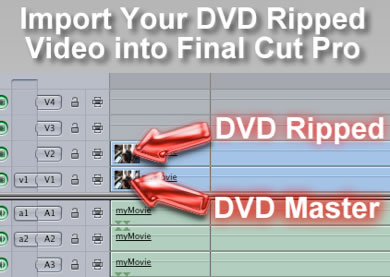
Testing your DVD in Final Cut ProAfter encoding your DVD, it is important to test for compression artifacts and interlacing problems. To do this you’ll need to rip the video back into Final Cut Pro and compare it to the DVD master video. Ripping Your Video From DVD for Importing to Final Cut Pro Before you can import your DVD into into Final Cut Pro, you need to rip it a Quicktime movie. To do this you will need DVDxDV. You can download a free trial version at: http://www.dvdxdv.com. Start DVDxDV and the main window will appear.
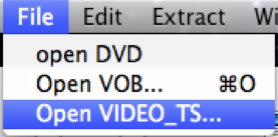
Select “open VIDEO_TS” from the “File” menu in DVDxDV.
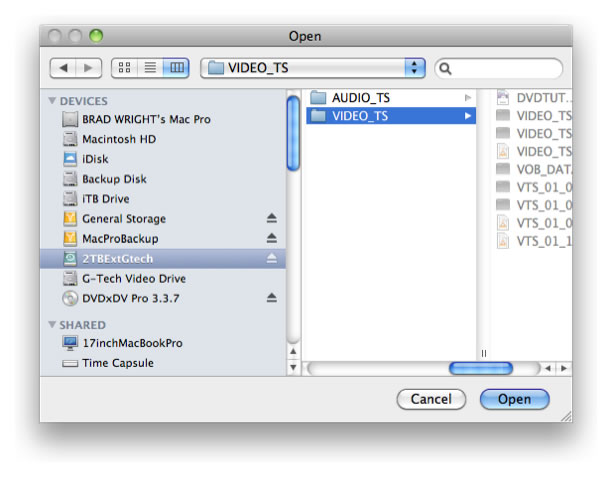
If you created your DVD with DVD Studio Pro, select the “VIDEO_TS” folder of the DVD copy you made on your hard drive. If you burned a DVD, select the “VIDEO_TS” folder on the DVD.
Your DVD contents will now appear in the DVDxDV Preview window.
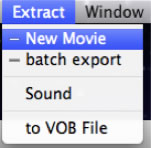
Select the “New Movie” option from the “Extract” menu.
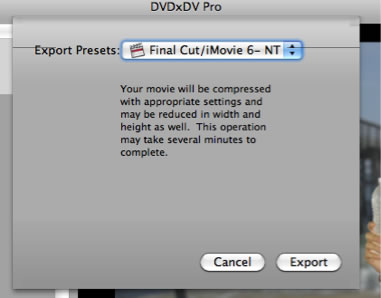
Next, the “Export” dialog will appear. Select the “Final Cut Pro/iMovie 6 - NTSC” export preset for NTSC DVDs and the “Final Cut Pro/iMovie 6 - PAL” export preset for PAL DVDs.
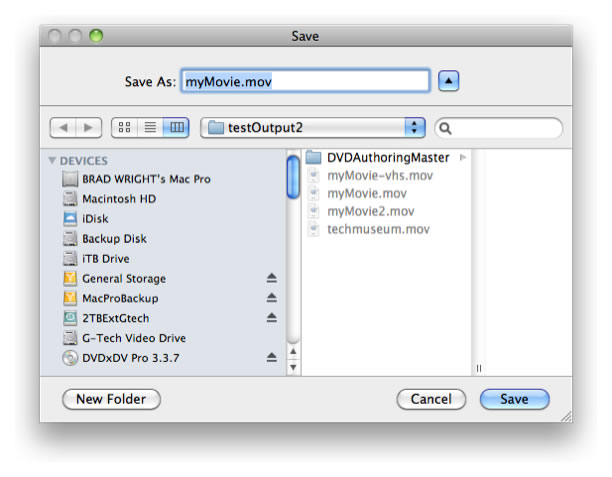
The “Save” dialog will appear. Select the place on your hard drive you wish to save the Quicktime movie to.
DVDxDV will begin converting the DVD video to a Quicktime movie.
Place your DVD master video and the Quicktime movie you ripped with DVDxDV in the same sequence. Keep the ripped Quicktime movie on a layer right above your DVD master video. Play the video back in your sequence out to your television. Turn the DVDxDV layer on and off to reveal your DVD master footage. As you switch between the layers, look for color shifts or changes in the brightness of the video. Play the DVDxDV ripped video back and check for jitter on your television monitor. If you see any color problems or jitter, you will want to make changes to your DVD encoding workflow.
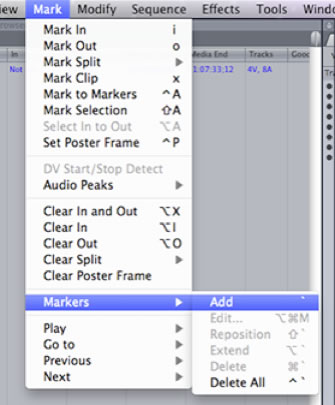
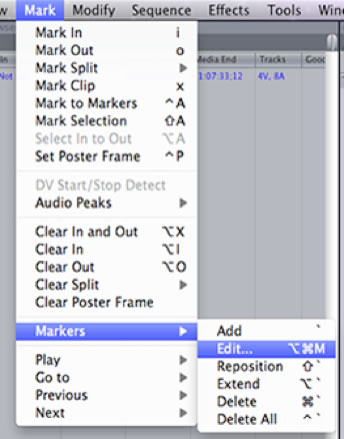
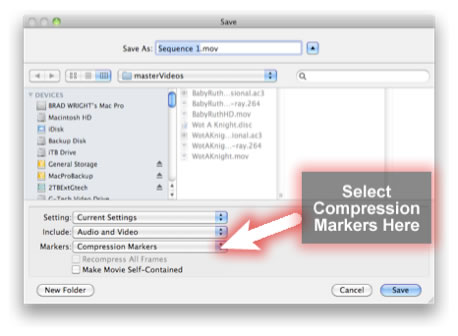
Compression artifacts are any visual changes that cause noise or blocks to appear in the video. These artifacts can be minimized by modifying your DVD master video. Fixing your DVD Master Video with Compression MarkersIf you are using Apple’s Compressor and Final Cut Pro, you can add compression markers in Final Cut Pro. Compression markers tell Compressor to place whole frames at certain points in the DVD to help minimize compression artifacts. Compression markers work well on zooms, pans, and cross dissolves. For example, if you have a one-second cross dissolve between two video clips, you can place a compression marker before and after the dissolve. To add compression markers, select the DVD master video clip in your Sequence. Find the location in the DVD master video where you want to add a compression marker. Select the “Add Marker” option from the “Mark” menu.
Next, select the “Markers Edit” option from the “Mark” menu.
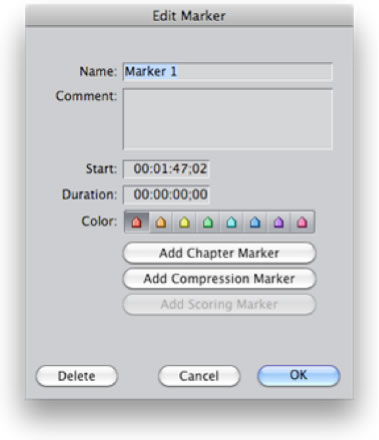
The “Edit Marker” dialog box will appear.
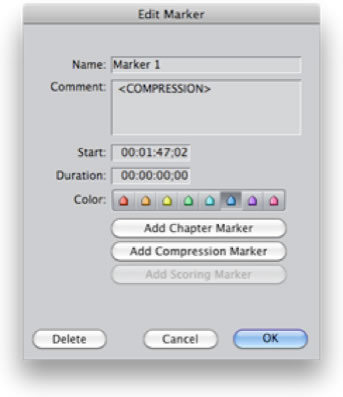
Press the “Add Compression Marker” button. A “<Compression>” tag will appear in the “Comment” section. Press the “Ok” button.
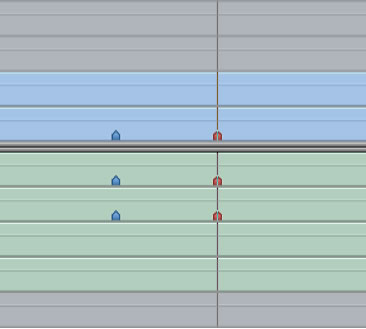
You will now see a compression marker in your Sequence. To add a another compression marker, you can just select “Markers Edit” option from the “Mark” menu.
After you have placed all of your compression markers, export the modified video to create a new DVD master video. Make sure you include the option to export the compression markers. You will need to submit the new DVD master Quicktime movie to Compressor again for the changes to take affect.
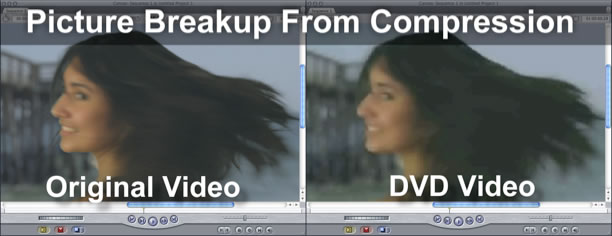
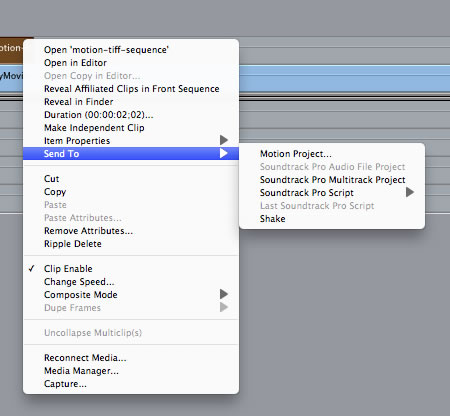
Fixing Compression Problems with Blur and Image StabilizationA common problem with video compression is where the picture breaks up into squares after encoding. Video noise, too much picture detail, and camera shake can all cause the picture to break after the video is compressed. There are several techniques to help reduce these problem. Fixing the Video with the SmoothCam FilterIf you have a shot that contains some camera shake, you might want apply the SmoothCam filter in Final Cut Pro. This will help reduce the amount of random motion that in the video. You will need to apply image stabilization to your original HD sequence in Final Cut Pro, since this filter needs to crop the video to work. Fixing the Video with Masking and Blurring in MotionA very effective way to fix picture break up is add blur to the video frame. Blurring can reduce the picture detail making the video easier to encode. Sending a small part of your DVD master video to motion can allow you to selectively blur unimportant areas of the video using the masking tool. This can dramatically improve the quality of your finished DVD video. To start using this technique, make sure you find the problem portions of your video and use the razor blade tool in Final Cut Pro to divide them up into small segments. You want to work with only small portions of the video to avoid long rendering times in Final Cut Pro. After you have created a clip that has the problem video, you will need to send it to Motion. To send your video clip to Motion, select your clip in Final Cut Pro and control-click or right click on the clip in Final Cut Pro to bring up a menu. In the menu, select the “Send to” menu option and select from the sub-menu “Motion Project”.
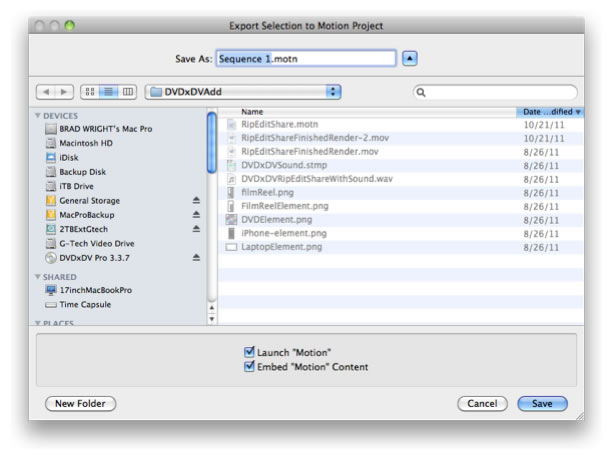
The “Save” dialog will appear. Pick a location and name to save your project.
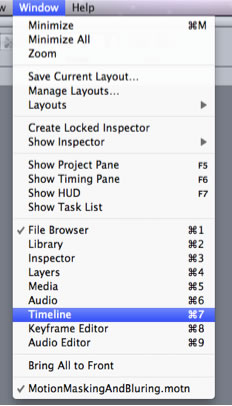
In Motion, display the Timeline window, by selecting the “Timeline” option from the “Windows” menu.
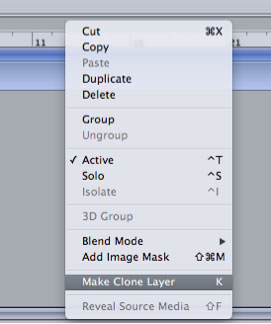
Right click or control click your video in the Timeline and select the menu option “Make Clone Layer”. Select your new clone layer in the timeline and make sure it is centered over your original video.
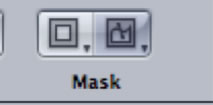
Select the bezier “Mask” tool on the menu bar.
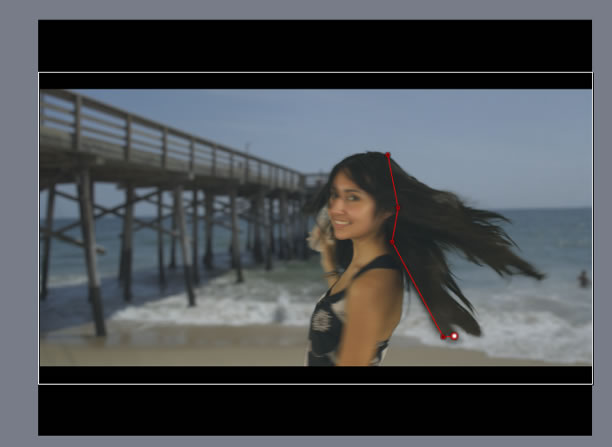
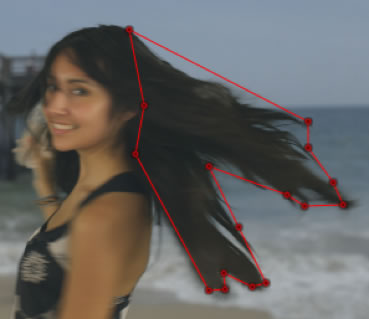
Select the points on the screen for creating your mask.
Complete your mask by clicking on the first control point you created.
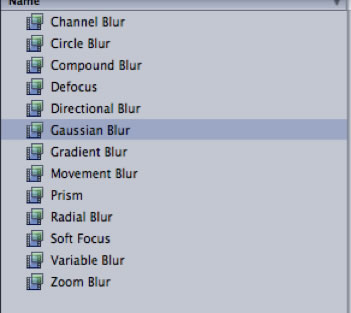
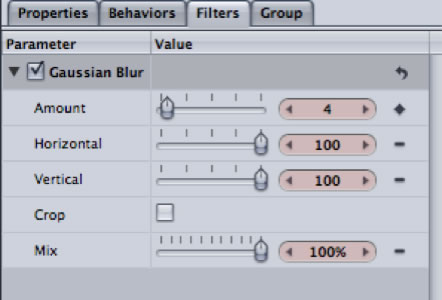
Select the Library Tab in Motion and select Filters and Blur. Grab the “Gaussian” Blur and drag it to your cloned layer which should be called “Group 2”.
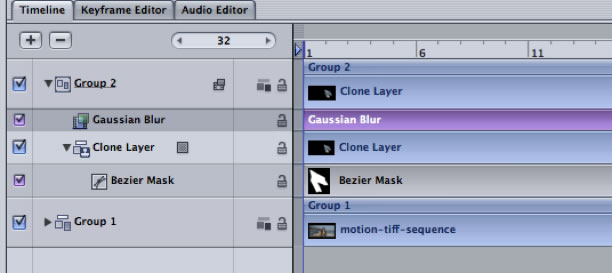
The Timeline should now look like this.
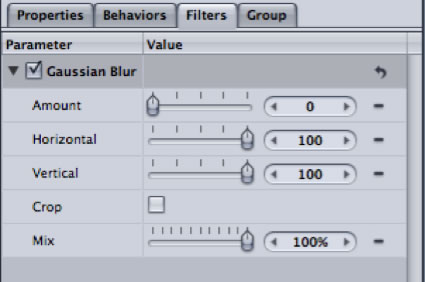
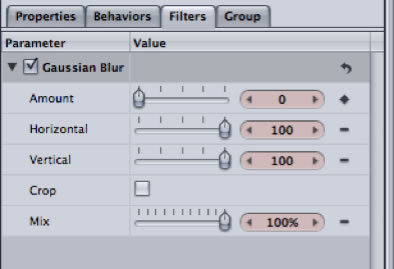
Click the “Inspector Tab” and set the “Amount” to zero.
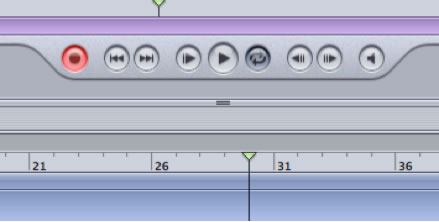
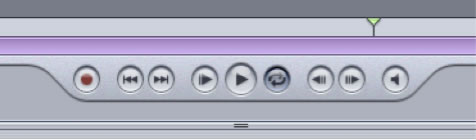
Move the Pointer in the Timeline where you want the blurring to start. Click the Record button. This will allow you to Keyframe the blur.
Change the “Amount” to 4 in the Filters tab.
Drag the slider to where you want the blur to stop.
Change the Amount in the “Filters” tab to zero.
Turn the Keyframe recording off, by selecting the “Record” button again.
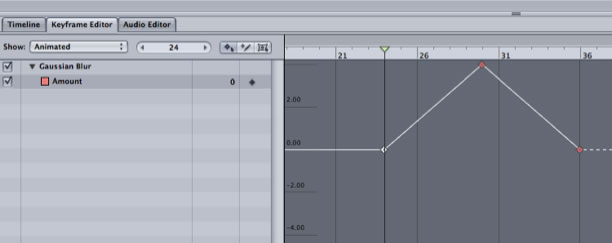
Click on the “Keyframe” tab on your timeline and make any adjustments to your control points by dragging or adding points.
When you are finished with your changes, quit Motion and return to Final Cut Pro. Your video clip will now have your Motion Project Name.
The changes you’ve made will be reflected in the Final Cut Pro preview window.
All of the blurring and masking can be key framed in Motion so that they change over time. You want to use blurring very carefully, so you don’t make the video look worse than the original compression artifacts. ConclusionConverting HD video to DVD isn’t simple or as straight forward as it sounds. If you have questions about your DVD encoding workflow, create a minute or two of test video footage with lots of motion. Use the techniques described in this article and see if you like the results. Some video will be easier to encode than others, so it’s always good run some tests before burning the final DVD. With some practice, you can create great looking DVDs.
Posted by Brad Wright to Rip DVD
Please Read Our End User License Agreement and How to Un-install or Remove DVDxDV Software |
|||