|
|||
 |
|||
|
Veescope Live Help Topics
Setting Up Your Green Screen.
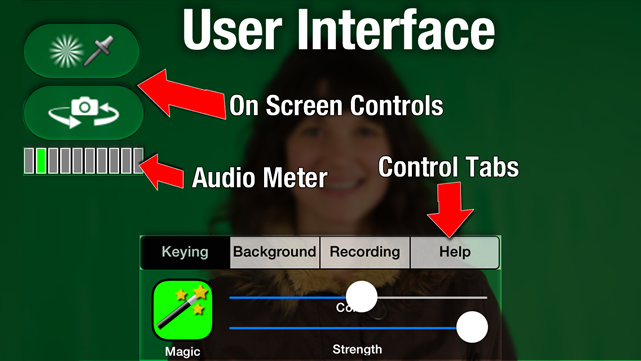
Veescope Live User Interface
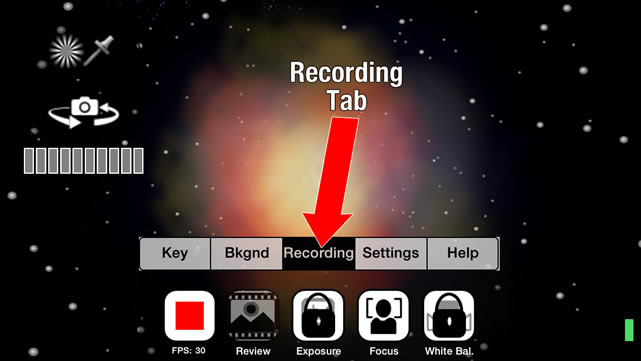
On Screen ControlsThe On Screen Controls allow you to change between the front and back camera, sample the color of the background, set the exposure point, and lock the white balance. Shows the audio level from the microphone. Used to change the Keying settings, the background settings, recording and camera settings, the settings and the Help section where you can get your questions answered by email at support@dvdxdv.com. Keyboard ControlVeescope Live can be controlled by a Bluetooth Keyboard. Use the settings app in iOS to connect your Bluetooth keyboard. The following keys are used to control Veescope Live. Space bar Starts and stops recording. Right arrow Switches to the next background in the background list. Left arrow Switches to the previous background in the background list. Control TabsKeying Tab
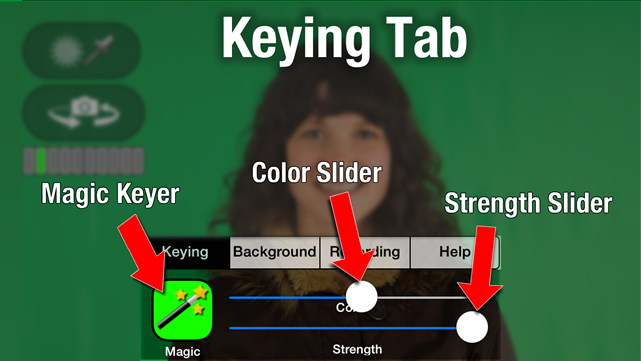
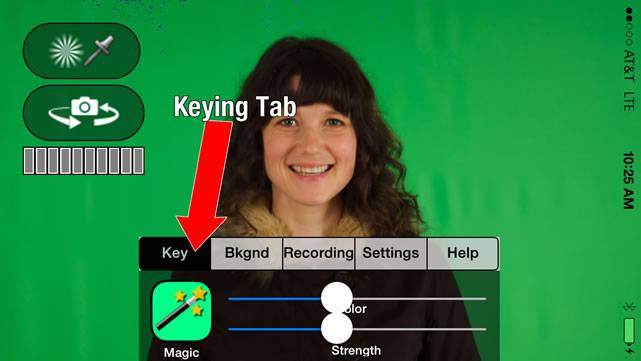
The easiest way to setup Veescope Live is to simply push the magic keyer button. The magic keyer adjust your camera for the best possible chroma key. You will need a white piece of paper or poster board to use the magic keyer. Changes the color used for the chroma key. The center of the slider is green. As you adjust the slider, the magic keyer will update showing you the color used for the chroma key. Adjusts the amount of background that is removed. Adjust the setting so that all of the background is removed. If your green screen is not evenly lit, has wrinkles, or the camera is not properly adjusted, the strength slider might remove some of the foreground as well. Make sure that your green screen background is free of wrinkles, evenly lit, and is a chroma key green certified background. Background Tab
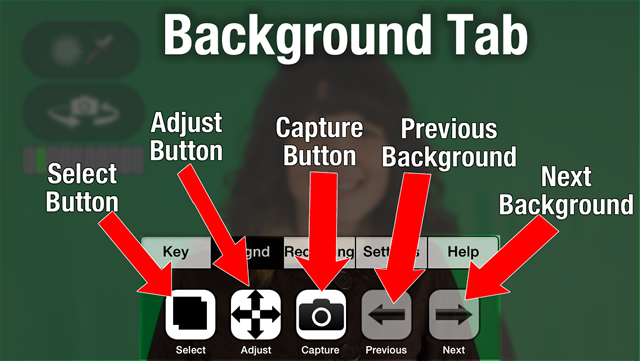
Brings up the background list which allows you to add mutliple photos or movies to be used as the background. Background movies require an A5 CPU or better. Adjust the size and position of the background image. Not supported for movies. Capture a frame from the camera and use it for the background. This is useful when you want to create an invisible man effect. Used to switch between multiple backgrounds, this button will select the previous background from the background list. Pushing this button will cycle through the backgrounds in reverse order. When it reaches the first background, it will automatically switch to the last background. Selects the next background in the background list. It will cycle through all the backgrounds in regular order from first to last. When it reaches the last background, it will start over at the beginning. Recording Tab
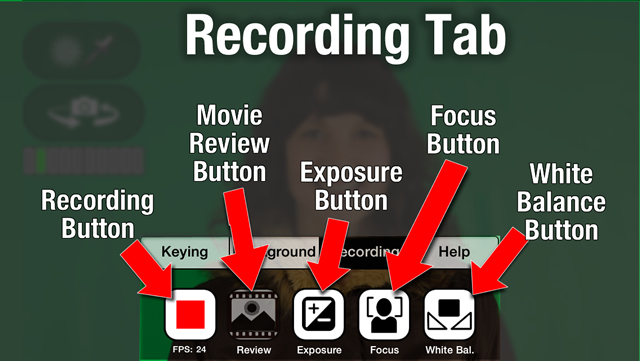
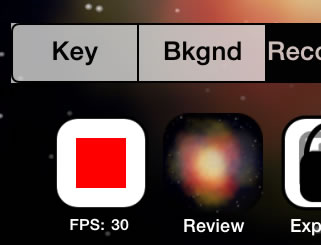
The recording button controls the recording of a movie in Veescope Live. The current frames per second is displayed just below this button. The camera's frame rate may vary under low light conditions. If you have an A4 processor, you should see only about 11-12 frames per second. A5 and above CPUs are capable of 30 frames per second. This button allows will display the last recorded movie. This is important because switching to another app will reset all of your camera settings. By previewing the movie in Veescope Live, the camera keeps it's exposure, focus and white balance settings. Pressing the record button will lock the exposure and white balance settings for the camera. The Exposure Button locks the exposure settings of the camera. To prevent the chroma key background from changing in brightness while recording, keep the exposure settings locked. The Magic Keyer Button will lock the exposure for you. This button locks the focus setting for the camera. White balancing the camera is critical to getting a good chroma key. Use the Magic Keyer to properly set the white balance and exposure before recording.
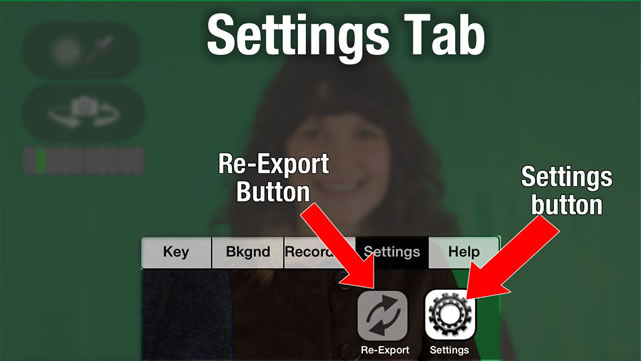
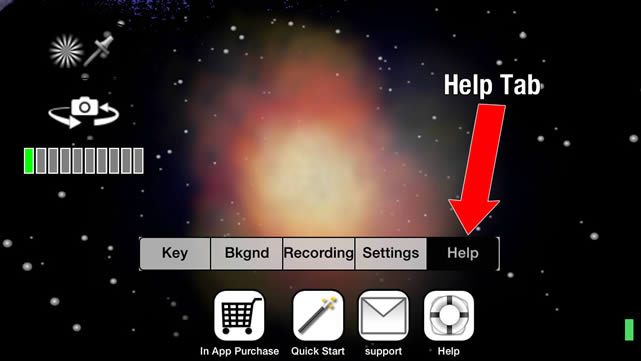
If you want to re-export the last movie you shot with the current background, use this button. If your last movie export did not finish, you can restart it from here. This button allows you to adjust settings for the Veescope Live. Use the settings button to switch between realtime and non-realtime recording. Realtime recording is the default setting, allowing you to switch between backgrounds while recording. Non-realtime recording will save two videos to your camera roll. One video will be the clean un-altered version, and the other will have the keying applied. Using non-realtime keying allows you to use to key the unaltered version in post production and use the keyed video as a reference. You cannot switch between backgrounds while recording in non-realtime mode. Help Tab
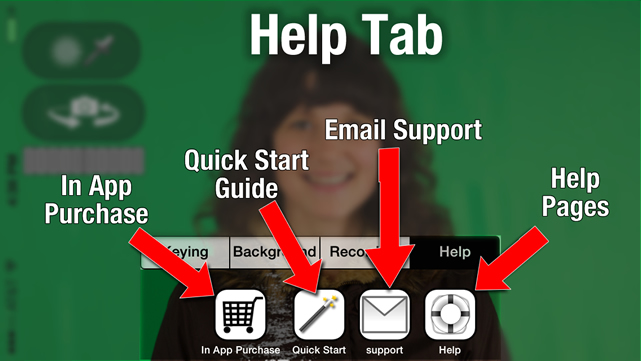
Use this button to remove the watermark from the keyed movie. Only available in the free version of Veescope Live. Use this button for the quick setup guide. Get help directly from within Veescope Live by email. This button is only enabled if an email account is setup on this iOS device. Displays the help pages for Veescope Live. On Screen Touch ControlsUsing the Touch Controls
Color Sampler
Touch the screen for picking a color. This control is not lockable or unlockable by selecting it. The Magic keyer controls the locking and unlocking of this control. Exposure
Touch the screen for setting the spot meter or exposure. Selecting this control again and it locks or unlocks the exposure settings. Focus
Touch the screen to select the focus point. Selecting this control again will lock or unlock the focus. White Balance
Select this control to lock or unlock the white balance. Touching the screen does not control the white balance area. Using the Magic KeyerAfter starting Veescope Live, select the "Keying Tab".
Press the button labled "Magic" to activate the magic keyer.
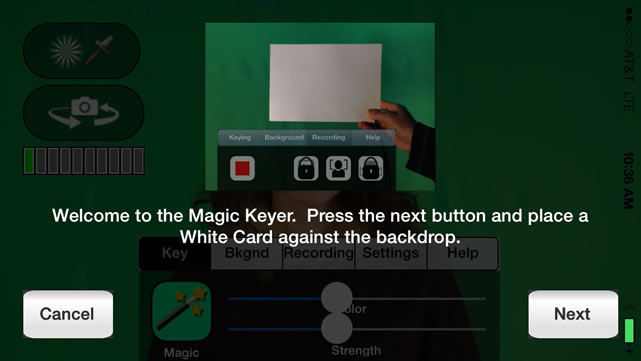
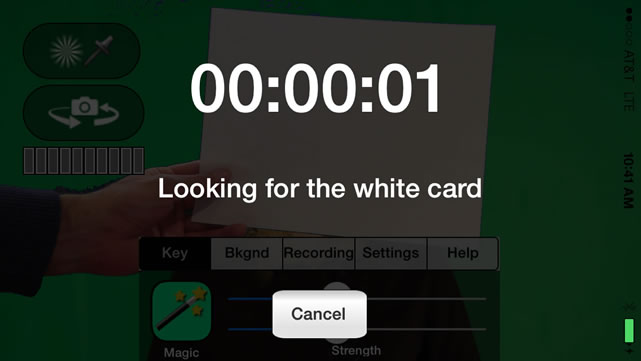
The magic keyer will ask you to hold a white piece of paper in front of the camera. Try to hold the paper as close to the background as possible. Make sure the paper is white and contains no writing. Press the next button.
Hold a white piece of paper or white object in front of the camera, and the magic keyer will set the white balance and exposure.
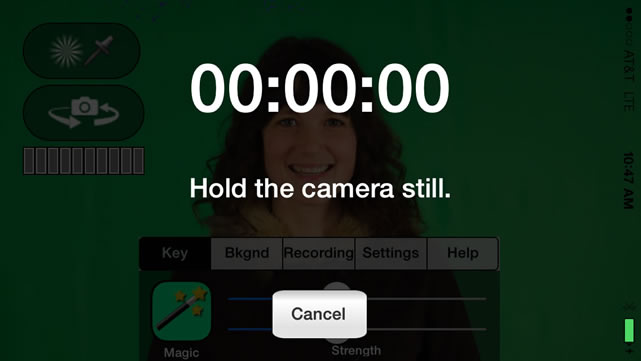
After the magic keyer is finished with the white balance and exposure, remove the white card and press the next button to find the best color to use for keying.
Press the next button, and the magic keyer will begin searching for the best color to use for the key.
Once the keyer is finished, click the close button.
You can now adjust the strength slider to further fine tune your key. Setting the Background ImageSelect the Background tab.
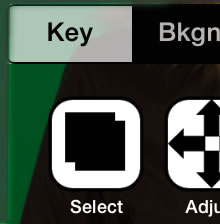
Press the "Select button" button.
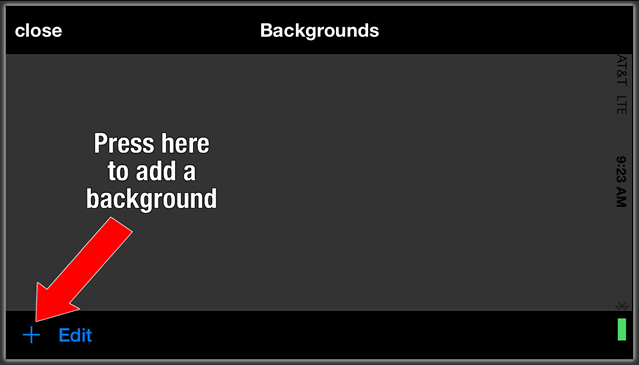
The Backgrounds list will appear.
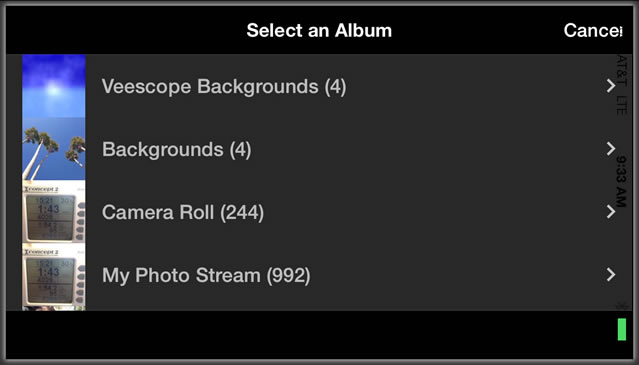
Press the "+" button at the bottom of the screen to add a new background. Pick a photo or movie from your camera roll or the inclued backgrounds.
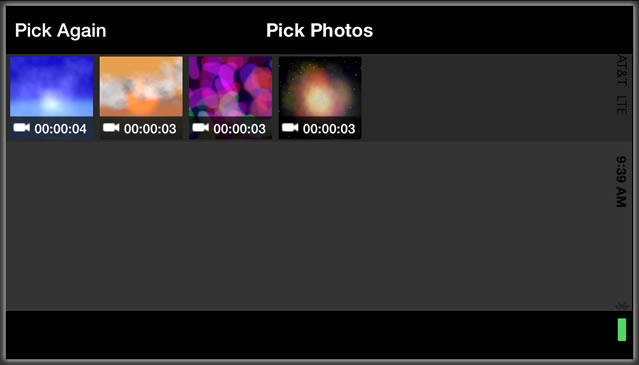
Once you've selected an album, you will see a set of photos or movies. Select one by touching the one you want.
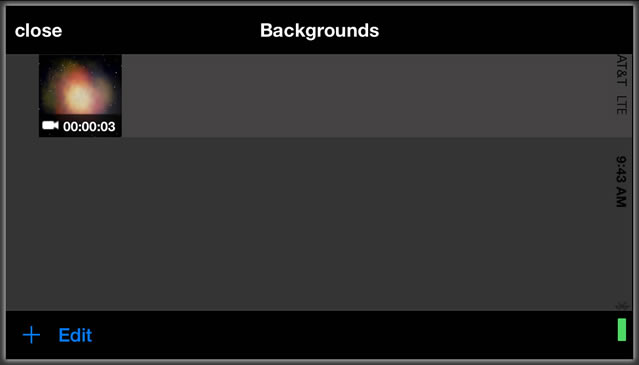
You will be returned to the background list.
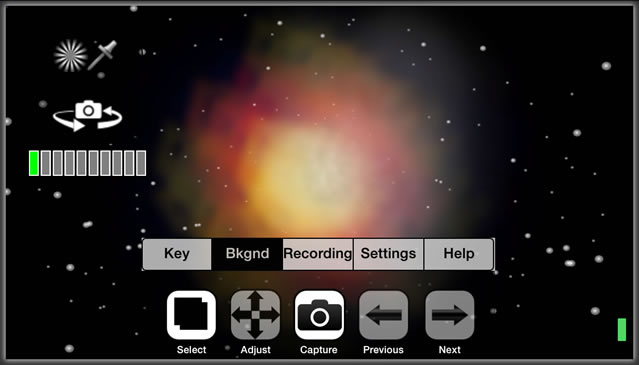
Press the close button and the new background will appear.
RecordingRecording a video in Veescope Live is easy. You can either record in real-time or non-realtime. Realtime keying means that the keyed effect is applied directly to the video as you are recording. Non-realtime means that the keying effect is applied once recording has stopped. The advantage of non-realtime recording is that you will have the original video with the keyed effect saved to your camera roll. This allows you to use Final Cut Pro or iMovie to create the final key. To record the video, switch to the "Recording" tab.
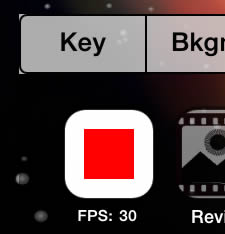
Press the recording button.
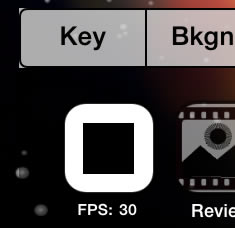
The recording button will switch to a stop button.
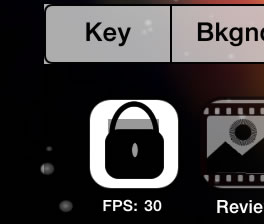
To stop recording press the "Stop" button and it will temporarily switch to a locked button. Veescope Live is writing the video to your Photo Library.
When Veescope Live is ready to record again, the locked button will switch back to a record button. The recorded video will appear in your Photo Library. To review the movie you just recorded, press the "Review" button next to the record button.
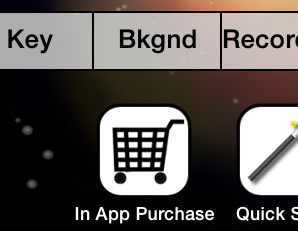
In-app Purchases - Removing the watermark (Not available in Veescope Live Full)In order to export a keyed movie you will need to purchase this feature. To do this click on the Help Tab. Click on the "in App Purchases.." button.
Select the "In App Purchase" button.
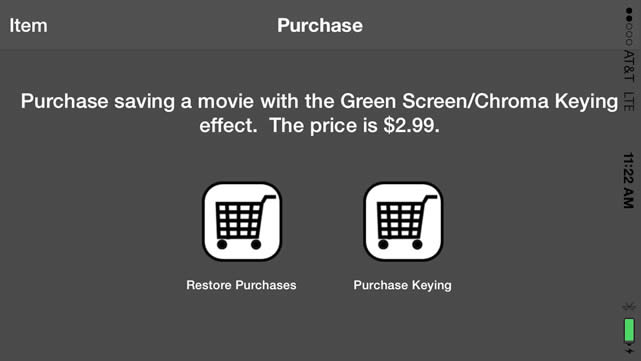
The in App Purchase dialog will appear. Click the Purchase button and follow the directions.
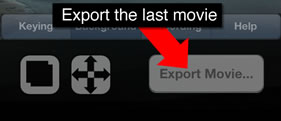
From here, you can either purchase the keying option or restore pasted purchases. Select the button you want and follow the directions. Exporting the Last Recorded MovieThis opion only works in non-realtime keying mode. If you need to export a movie again with a different background or keying settings, you can use the "Export Movie" button from the background tab.
Company • Contact Us • End User License Agreement • Un-installing or Remove DVDxDV Software |
|||